Plywood is one of the versatile materials for any kind of DIY project from making furniture to various projects concerning home improvement. However, to give plywood that professional look, it is necessary to provide a proper finish. From staining to painting and sealing of plywood, every step involved in finishing has its importance as far as looks and durability are concerned. In this blog, we discuss simple tips on how to finish plywood for a polished look. Let’s dive in!
1. Preparation of Plywood
Preparation of plywood before any finish is quite important. This makes the texture smooth and friendly enough for staining, painting, or sealing.
Sand: Lightly sand the plywood with medium-grit-about 120-grit sandpaper to take out any rough spots or splinters. Take it one step further with finer sandpaper at 220-grit for the finish.
Sanding: The surface is cleaned by wiping with a clean damp cloth to remove dust. Allow the plywood to dry out completely in the next step.
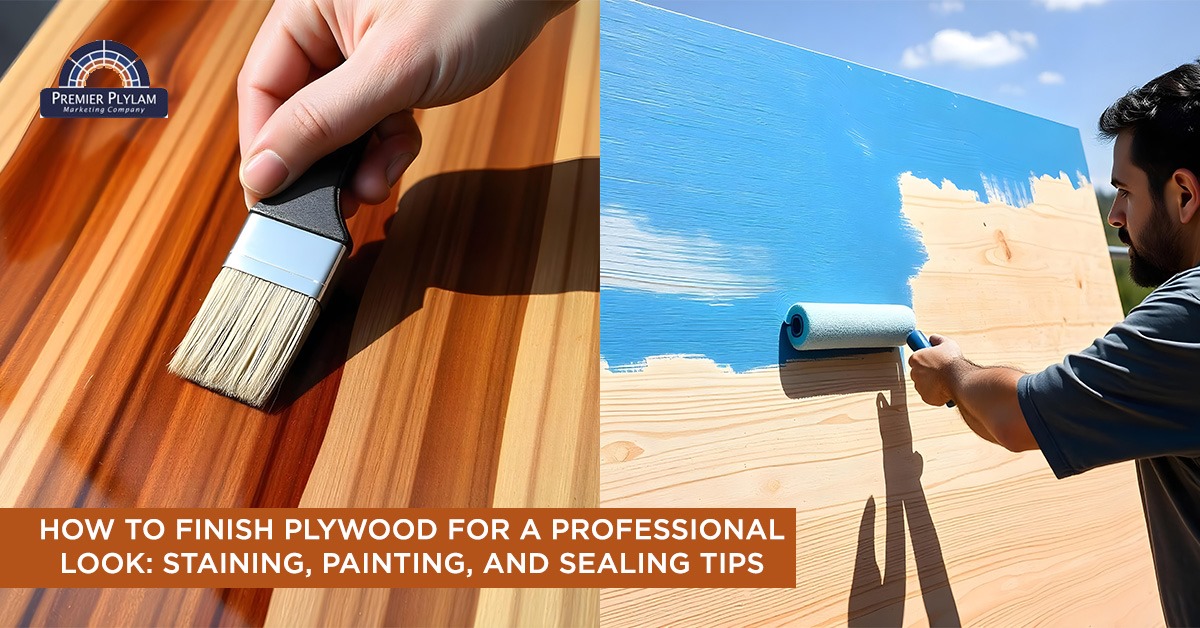
2. Staining the Plywood
Staining can be one of the best ways to bring out the natural grain in plywood, giving it that rich and classy appearance. The following steps will guide you through how best to achieve professional-looking plywood stains.
Choose your stain: Find a colour that best suits the one you will use for your project. Use it on a scrap plywood piece and have a feel of how it will look before doing it on the whole surface.
Stain Application: The stain is to be applied using even strokes with the grain, with a clean cloth or brush. After a few minutes, this should be wiped off using another clean, dry cloth.
Multiple coats: Additional coats can be applied for deeper colours. Before adding another colour, first, give time to dry the previous one.
3. Painting Plywood
Do you like colourful or solid looks? then go for the painting option. Here are a few steps which will give you an idea about how to get a smooth even after finishing the paint
Primer first: Before painting first apply the wood primer coat. It helps the paint stick well and gives an even colour to the surface.
Paint Selection: Good-quality latex or oil-based paint to be used. Apply it in thin, even coats, comfortable with a brush or roller. Two to three coats can be enough for an ideal finish.
Drying between Coats: Allow each coat of paint applied to get completely dry before overcoating.
4. Sealing the Plywood
Sealing is the last but most important step to protect your plywood against moisture, scratches, and wear altogether. A good sealer can help bring out the beauty of either the grain in wood or a paint finish.
Choose a sealer: Many different types of sealers exist, including but not limited to polyurethane, varnish, or shellac. Choose one for your project that does the trick.
Application: Apply the sealer in thin, even coats with the brush. Allow to dry completely between coats. Light sanding after each coat will promote a smooth finish after several layers.
Conclusion
Whether it’s stained, painted, or sealed, preparation and patience are the keys to a pro appearance with plywood. Follow these steps to get your project off to just the right start. With the proper techniques, your plywood projects will have the perfect finish. Check out PremierPly for more plywood tips and supplies!